I'm trying something new - for me- posting from my phone. I hope it works. Unfortunately, I don't think I can link to anything.
And Now for my post:
Camp is over for the Summer - which makes me sad because now we have 2 1/2 weeks to find something to do with our son. Ugh!
Here are the camp tip 'gifts' I gave out this year: Blow guns with foam darts from the dollar store with a related message (borrowed from a lollipop post on Pinterest).
I also made matching cards to hold the $$ with a sign that said, "Blow THIS however you like."
Easy peasy and cheap, too!
Showing posts with label Scrapporreia. Show all posts
Sunday, August 19
Friday, May 18
Store bought cake
This year, we ended up celebrating my son's birthday several times. There was the school party (see the Pikachu cupcakes), his real party, and his first sleepover. So we didn't want to overdo another celebration. We had a few of the kids in the neighborhood over for cake and a short, mid-week playdate. I bought a store bought cake and went to the dollar store and got these cute ninjas. Check it out... it really made it look personalized with very little effort. So don't let the fear of baking stop you from doing something fun - and different for your next gathering. The dollar store has lots of ways to spruce up a grocery store confection.
Monday, April 23
Cupcakes - Pikachu
These are cupcakes I made of Pikachu (one of the characters in Pokemon - a show on the Cartoon Network). My nephews were obsessed with Pokemon (12 years ago) and my son got that gene passed down to him. I made these for this 6th birthday party at school . This photo is only half the batch because I ran out of those gummy candies that I used for the ears.
When I decided to make these, it was late, I was tired, it was raining hard outside and I had no cake mix. So, after going out to buy the mix, you can imagine I didn't think it through very well. The cake and face were simple. I used yellow frosting and black Wilton pre-made icing. For the rosy cheeks, I used M&M's.
The ears were the challenge. Since it was so late, I wanted to just use stuff we had in the house. I tried: cutting graham crackers (too crumbly), cut corners of Madeline cookies (too soft), Gold fish (these actually worked but I didn't want to ice them, and they felt too small), and cut corners of marshmallows (these worked but, again, I didn't want to ice them to make them yellow.
Nothing I had at home actually worked. So I gave up, went to the store tonight and bought those gummy, sugar-coated wedge candies. The problem is, I needed 30 cupcakes and the box only had about 18 yellow wedges. So, I guess I have to go back to the store in a little while.
The look on my son's face as the yellow cupcakes took shape into Pikachu was priceless and make it all worth the effort.
Monday, February 20
Outdoor Movie Party
I can't believe that I never posted my son's 5th birthday party. It was really fun... from start to finish, beginning with the invitations I hand made. I personalized the envelopes with each child's name and invited the whole family on the inside.I want to credit the paper and template designers but my laptop fried a few months ago and I lost all my stash and all my photos. :(
I'm pretty sure the papers were from MScraps and the template was from Simply J Studios at ScrapMatters.
Here are the invitation 'ticket', envelope and a close-up of the insert.


Each kid had their own bag to fill up - and all the bags were full!
Each kid got a few flashlight rings (a huge hit!) and glow braclets
We served Pizzas and had two cakes with Ben 10 decoration on them.
For the main feature, we set up a large canvas and projected the movie Astro Boy.
Tuesday, February 14
Valentines Crafts from Michael's
Happy Valentine's Day!
I got an email from Micheal's crafts and saw this fun project that I had to do with my DS. I modified it a bit. Instead of buying their pre-made foam hands, my son traced out his hands and we cut them out of foam sheets. The project 'spelled' out the letters I and U and I love you in sign language. Then I strung them together on a piece of transparent red ribbon and taped it to the bathroom mirror so that my husband would see it when he went in there. Thank you, Michaels. :)
We're going to do something similar for my FIL for his birthday card. My DS had so much fun making these.
Sunday, February 12
R
I found out that a co-worker's husband was diagnosed with a form of cancer that had metastasized to his lymph nodes. They are a very close couple and the vision they'd both had was of growing old with each other. Luckily, its totally treatable and he will hopefully be fine in a few months after some rigorous treatments. In the meantime, they are just going about life and being hopeful. I wanted to do something small for them both, knowing that a big gesture could potentially make him feel like the disease is too much in the forefront and being talked about at our work.
Before the holidays, the couple had gone on a yoga retreat and the both loved it. In fact, the husband said that it was a life-changing weekend for him. I decided to gather some yoga-type grownup treats and package them together. There is a 2 CD set that I got from Target and scented candles from Walmart. I personalized it by using his first initial to brand the products. His name is Russ, so I chose some R words that related to healing. Here are the photos below, and if you continue scrolling down, I've included a freeprintable (minus his name). I used some decorative paper from Michaels to build a layer up.
I placed it all in a cheap box I got at Tuesday Morning (under $3) and some coordinating brown tissue.

Sunday, January 29
Tutorial: How to make your own cookie cutters.
WHY? Why would anyone bother doing this? See below - for the why and the how. I was inspired by a You Tube video (I think) which I've since tried to search for so I could credit her, but I couldn't, so I took a shot and making my own and thought I'd share it with you guys.

And here are the finished cookies. I didn't have time to ice them - mostly because they were all eaten, but also because I didn't have yellow food coloring. Maybe the next batch. For the Cookie, I used Martha Stewarts recipe

Sunday, January 22
The Dragon New Year ... and a giveaway
Happy Chinese New Year.
This is the Year of the Dragon - MY year. :) Which, if you can do the math, means I'll be 48 at the end of the year. Yikes!
With my Aunt getting older and my mom living so far away, I cooked the whole meal (well, most of it) for my family. It was surprisingly so much fun.
Chinese New Year is akin to Thanksgiving for us. Its a time of reflection, happiness, and hope for the future. So, even if you are not Asian, Happy New Year everyone. May the luck of the Dragon spread to you all
I wanted to make something to go in a frame that I rotate prints in. I am also printing one for my mom's restaurant - with the addition of the restaurant name.
GONG HAY FOT CHOY
Thursday, January 5
Thanksgiving Wall Sign
This year we decided to have a few friends over for Thanksgiving and what better way to really make them feel like part of the family than printing a welcoming poster? I included our guests' last names, printed it cheaply at Costco and found some nice wooden frames on sale at Micheals. Our guests loved it and even asked if they could have it when we took it down.
Monday, October 31
Halloween Treat Bags
I've (sadly) been absent from the scrapping world for a little while now. Life (and mostly work) have gotten in the way. But regular life continues and sometimes, I get to do few little fun projects. Here is the latest one from Halloween. They are Trick or Treat bags that have slits in them for glow bracelets. It gets dark by 6-ish and our kids aren't the best listeners when we say, "Don't run" or "look both ways".
I saw these bags and had to try a hand at making them - with my own designs and twist. My son was a Ninja so I make the Ninja bag for him. I made a few but gave them away before I got shots of them. Below are shots of them in the light and one in the dark with them all aglow. lol
I was inspired by a pin I saw on Pinterest. Did I mention lately how much I love that site? :)
Here is the original pin and below that is a link to a tutorial from the original creators.
My twists and reviews
I didn't do the mesh that they recommended. Instead, I got some cheap bandanas, cut them in half and sewed it to the bag. They say to use felt for the design, I just cut it out of the bag, making sure to leave some parts touching the edges.
The most difficult thing was finding 6 matching glow sticks. Did you ever notice that they have white sticks that are yellow and green when lit? Well you can't tell what they are when they're 'raw'. I put the sticks into the bags and figured we'd pop them when it got darker. I gave my hubby the duty of separating the glow sticks - guess what? He's color blind! What was I thinking? lol
Sunday, September 11
Pinterest inpired
I have been obsessed with Pinterest lately. There is just so much inspiration on that site. You have to be invited (unless they've changed that) so if you're interested in checking it out, let me know. I love love love it.
Anyhow, I saw some photos people did of their kids with posters of the first day of school. I also saw some others with things about their kids like: favorite TV show, book, etc. I decided to combine these along with his size and other personal stats and made this photo to commemorate each year as he grows up. I just hope I remember to do this every year.
Gulp. He got so big!
(BTW - I wasn't going to put in his name but he typed it, so I wanted to keep it there. )

Sunday, August 14
Summer Camp Gifts
Its been a crazy, busy Summer and I've neglected many things scrapping related. In fact, I've bowwed out of most of my CT duties, with much regret. I'm still bouncing in and out of MScraps - because the stuff in the galleries are always so inspiring and also because the ladies there are so fun and inspiring themselves. There is also no pressure there. They love when you join in but don't make you feel negligent when you can't. If you haven't checked out the shop and forums, you must. :)
Anyhow, my DS will be finishing his 8 weeks of summer camp at Rolling Hills Day Camp. We love the place and feel like he's so well taken care of - especially since he's there from 8:30 until 4 - with an additional hour where he's on their bus. We get regular reports and photos as well as a LOT of things sent home that he makes and achieves. Thanks to them, our son dove off of the diving board for the first time.
So I didn't want to just send in money at the end of the Summer (Not that its in my nature anyway), so I made these fun - camp inspired - packages for each of his counsellors and the other important people who've taken care of him this Summer.
Camp's S'more Fun

Tuesday, July 26
Sucker Send-off
I have a new obsession that has sucked up my time. Its like a vortex whirling around and mesmerizing me. Its Pinterest, a site that you can post things of interest and others can view and share. Kinda like a bulletin board meets facebook.
I have a board just full of things I'd like to make or do. One of those things were these giant lollipops. I saw the photo and thought, "I can recreate that!" but I needed an occasion. Luckily, my friend was leaving our company and I got the chance.

I used gift wrapping paper rolls, wrapped them in white kraft paper (using glue tape along the length) then blew up balloons and wrapped those in cello bags held together with scotch tape. They came out so cute!
Then I made banners with the words: It SUCKS Ur LEAVING.
For kicks, I threw in some real lollipops. My idea was to make the word SUCKS out of the lollipops so I bought this humongous bag. Turns out I didn't need nearly that many.
My friend was really happy with his decorated office, even if he spent the day doling out candy.
Wednesday, July 13
Cooperative Kids or How to Photograph a group of kids
When it comes to photography, there isn't any such thing as cooperative kids. Which is why I thought I would give a little photography tutorial. How do you get a great shot of a group of kids without making it look photoshopped? You have to start with the right kind of shots. Not the right shots. Because if you can get those anytime you want, you wouldn't be reading this.
The first thing you have to do is gather the kids. Here are some key clues:
Feed them
Let them sleep
Tell them what's happening.
Tired kids are cranky. Period. There is nothing more you need to know. No one wants to work with a cranky kid - especially their parent. Trust me.
Same goes for hungry kids. Cranky. See above.
Prepare your kids. As with most things, let them know what is going to happen. If they think they are going to the park to play with their friends, and you suddenly make them sit still and smile - they'll feel duped. Then they'll get cranky. See above again.
Just tell them that you are going to have all the kids sit together, smile really nicely, be happy to be together. Then Mommy (or Daddy - or whomever) will take a few quick pictures. I usually add: If you smile really nicely, look right at the camera, then we will be done much quicker and then they can play longer.
These are pretty simple precepts for doing anything with kids. Eat, Sleep and Information.
Once you get to your location, get rid of any overt distractions. Don't bring balls, bikes, dolls and lay them all out. If having any of these helps focus your child, bring them along. In a bag. Try taking the photos just using your vocal commands. Get other parents to place themselves directly behind you and call to their kids. Try these things first. Once toys come out, their focus is all over the place and you may even lose a kid or two to a truck, never to return again.
Let me go back to the parents helping. If you have many parents trying to take the same shot, you will NEVER get all the kids looking into your camera. Every kid will instinctively hear their own parents and look in that direction. If this is an important shot, have each parent take turns quickly shooting. Or give all the shots to the best photoshopper. Otherwise, if you are the only photographer, its important that the parents who are calling out to their kids is directly in front of you (under the camera) or directly behind or over you. That way, when the child looks up, they are also looking at the camera.
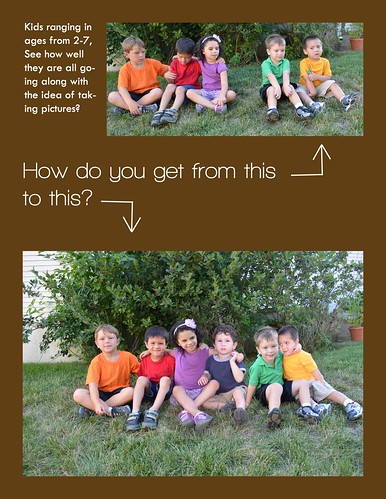
Get down on their level. Kneel, sit, squat. Otherwise you will get a shot that looks unnatural or uncomfortable. When the camera is parallel to the children, the photos look engaged and the people don't look distorted.


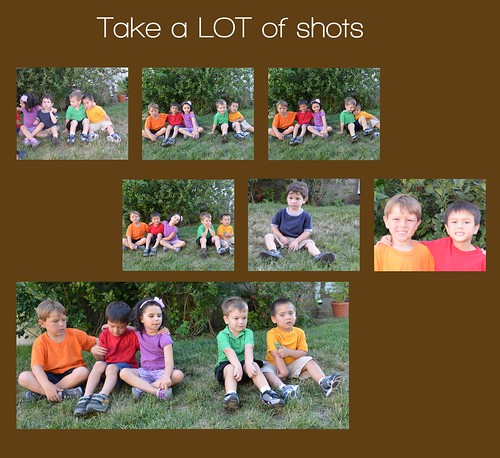
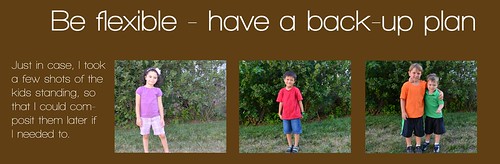
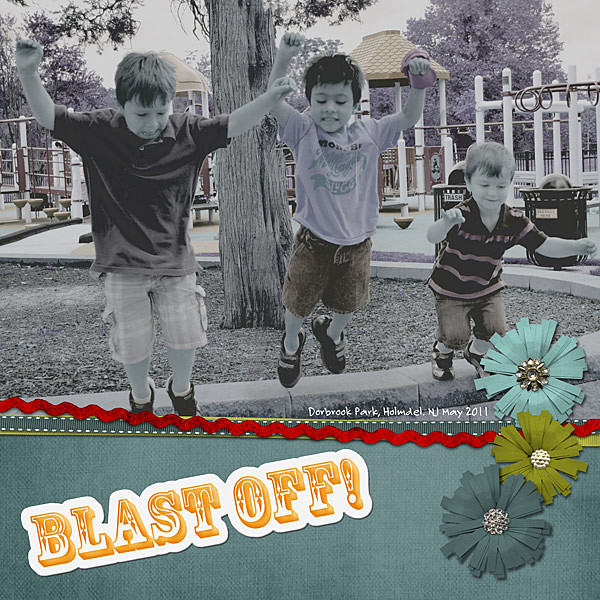
Take a LOT of shots. My unofficial rule of thumb is about 2-4 shots per kid. With digital, thats totally feasible. Your goal is to get one nice shot of each kid so you can composite them in Photoshop later. Above are the photos that I pieced together to make the final layout.
Back-Up Plan When in doubt have an alternate game plan set. For example. I wanted to take a group shot of a bunch of kids sitting down, arms around each other. I decided this when they were all playing. No notice, half of them had not eaten, TONs of toys all over the place. Whats a girl to do?
I tried to get them to sit down. I even got off a few initial shots. Then mayhem. Kids were annoyed, some ran off. You get the idea. So my back-up plan came into play.
Original plan: line up the kids sitting, arms around each other.
Back-up plan: Shoot each kid standing, happy, smiling, then photoshop them together later. More work, but could work.
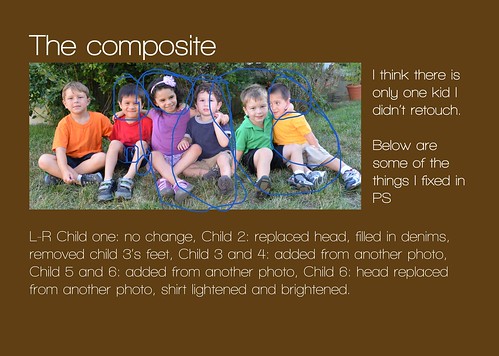
Then Photoshop.There is a lot of controversy these days about parents photoshopping their kids. This is not what the uproar is about. This is just preserving your mental state, not for the sake of looking perfect. Sanity vs vanity. I addded heads, took away feet, removed fingers, added bodies, took bodies away. But, an hour later, I had a great shot that I could actually use.
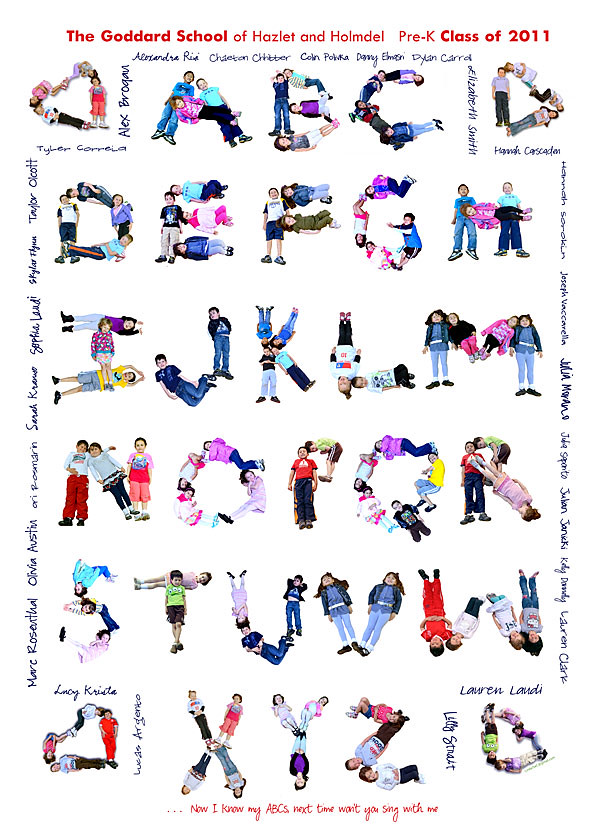
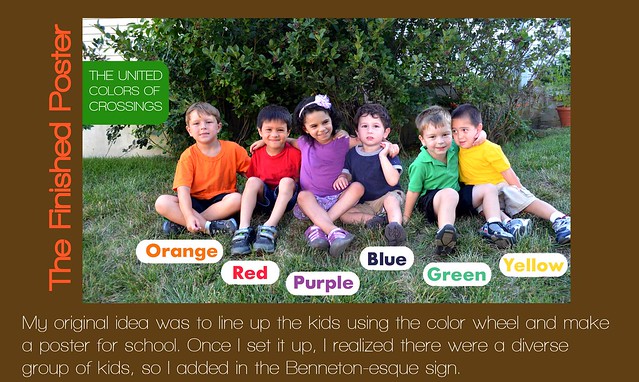
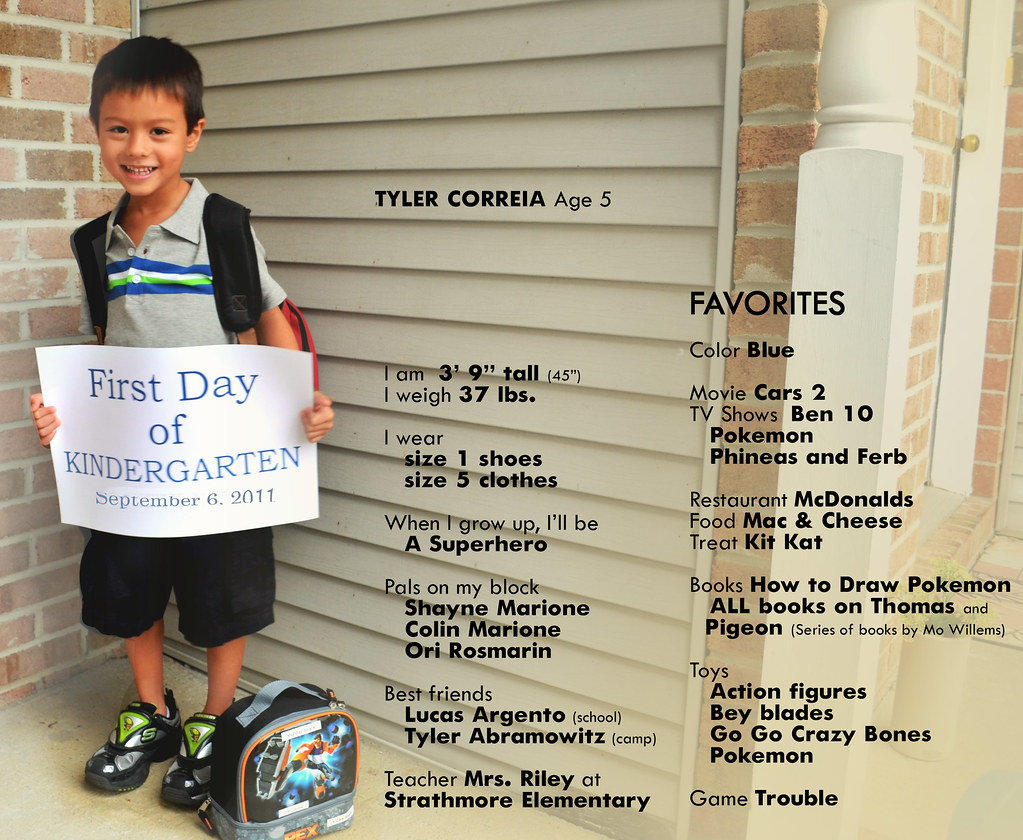
NOTE These guys are: Irish, Italian, Chinese, Portuguese, Isrealie, Russian and Korean. Crazy, huh?
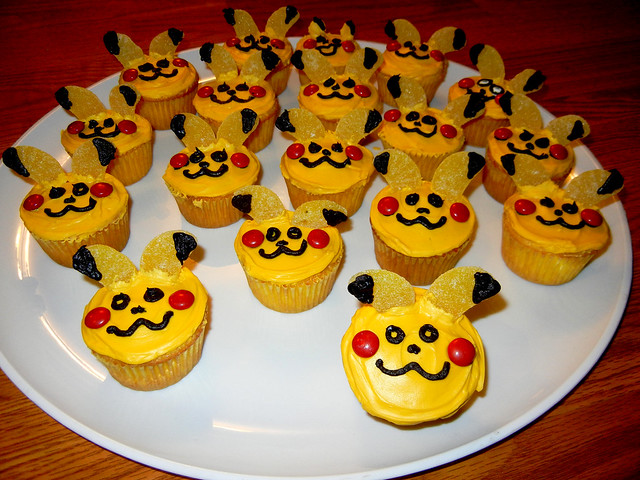
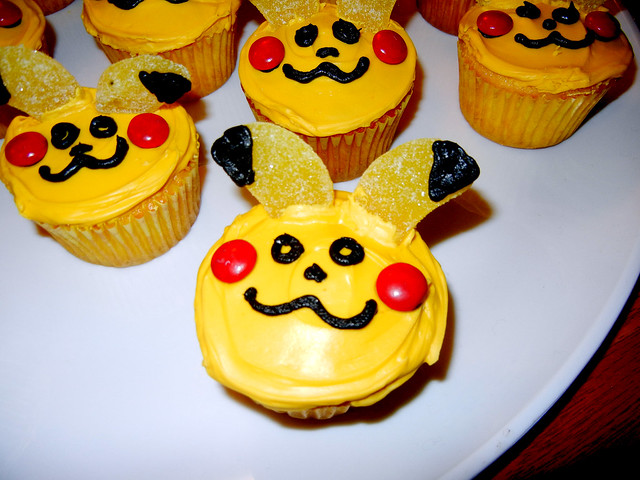
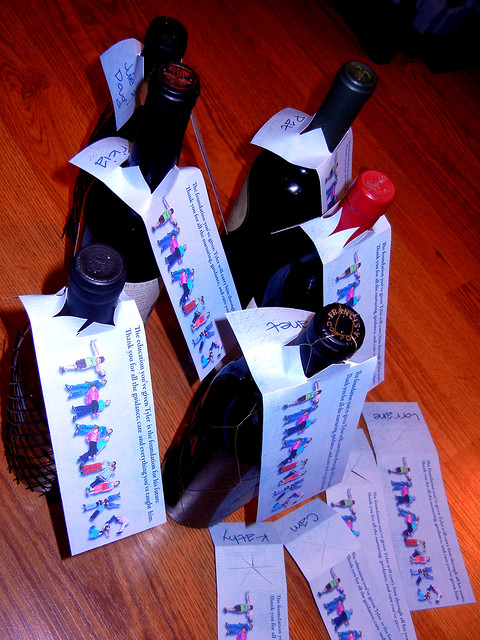
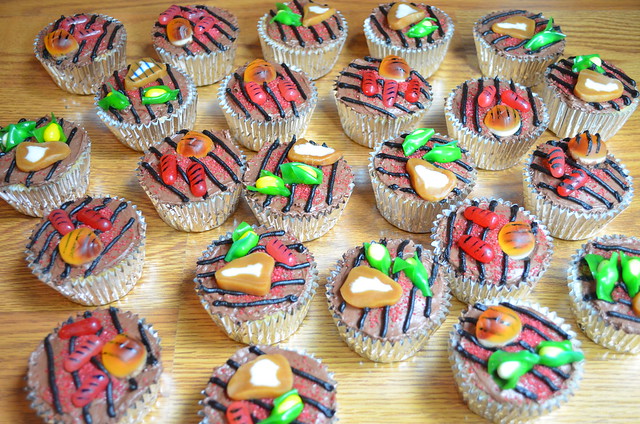
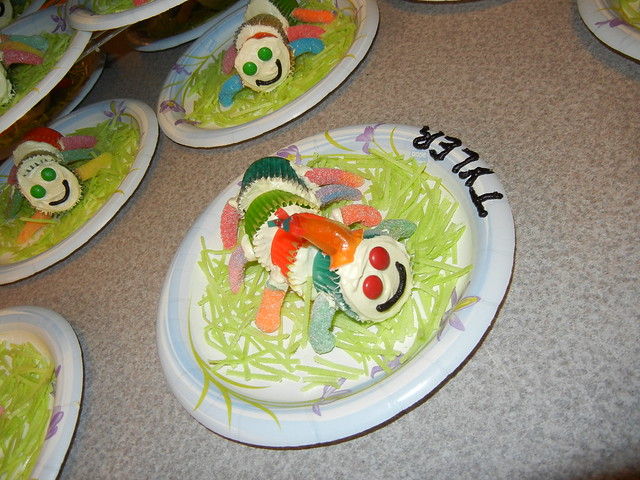
Wednesday, July 6
School's over
...and that meansTeacher Thank you gifts. This year was easy (and hard) for me. My son graduated out of The Goddard School (sniff, sniff) so I took pictures of every kid on my son's class, contorted into the letters of the alphabet and made a poster for the school.
For the teachers and staff, I created Thank You cards. It was a practical and personal gift. Some of these teachers have known these kids since they were mearly a few months old. Here is what the card looks like.

and I did hang cards from the wine bottles we gave to the teaching staff. I was pretty thrilled with the idea because even if we just got them a fruit arrangement from Edible Arrangements, we would have spent about the same as 2 cases of wine - once we got the 'case' discounts.

I used paper from MScraps' June Collab: The Things You Do - a perfect kit for father's day. I don't recall where I got the stitching from.
Here is the poster that I made from the photos I took. I presented the school with the poster along with the teacher's gifts.

Food fun - its Grill Time!
Happy Post 4th of July, everyone!
As the weekend approached, I got an email from Michaels showing these way cool cupcakes that looked like little grills. I put my own touches to it but basically, they are the same. Here are the ones I made.

Here are the 'instructions':
Fill silver foil cupcake liners about 2/3 full with packaged cake mix.
After baking and cooling, level off the cupcakes with a knife so that they are flat.
Ice with dark Chocolate frosting. I used Dunken Hines' Whipped Dark Chocolate.
Sprinkle Red sanding sugar in the center to simulate hot coals.
Select Black ready to use Wilton icing. Using a round piping tip, evenly squeeze lines across the icing to simulate the grill bars. (Michaels suggested silver bars using a mix of black and white - I don't know about you guys, but my grill has been black since day one. lol)
For the candies, I used yellow Jelly Belly jelly beans, wrapped with the green part of fruit roll ups. Did you guys know how hard it is to find green fruit roll ups? I ended up having to buy a mixed box of 3 different types, and cut the green part off of a 'double-sided' kind. This is sorta what the box looked like, only mine didn't come with tatoos.

To make the steaks, I cut the caramels into 3rds so that they were thinner and pinched them in at the bottom a bit.
The hotdogs were the pink and red Mike and Ike candies. And the burgers were some random bug shaped gummies I'd found and pressed way into the icing.
To make the grill marks on the candy, used cake decorating pens. They came in a set of 4 different colors in the baking aisle. They didn't have black, so I ended up using blue and they seemed to work just fine.
Monday, June 27
Back from 'hiatus'
When technology works, its great. When it doesn't it can just about stop all progress if you've come to rely on it. And I have. My internet was barely working (like 20 mins here, 10 mins there) and it was beyond frustrating. Then we thought we'd fixed it, and it'd be out again. Needless to say, I haevn't been much in the digiworld during the past two months. But I haven't been stopped either.
I'll start by posting my latest pages and work backward until I catch up.
Here is Wimpy Chomper's latest kit: He's Out of This World, available at ScrapMatters. She does the funnest kits, perfect for kiddie shots.

And here is my page Blast OFF, created with it.
I'll start by posting my latest pages and work backward until I catch up.
Here is Wimpy Chomper's latest kit: He's Out of This World, available at ScrapMatters. She does the funnest kits, perfect for kiddie shots.

And here is my page Blast OFF, created with it.

Monday, April 25
Today my baby turns 5
I'm so proud of the little boy he's growing into and sad to see the parts of him that are a little baby fade away. This one little guy gives me more joy and genuinely melts my heart more than I ever thought anything could.
Happy Birthday my little love!
Here is a shot of his school birthday cupcake. I made 30 of them. yeah, THIRTY. That's a mama's love, huh?

Help, my house is infested with catepillars... cupcakes, that is!
Happy Birthday my little love!
Here is a shot of his school birthday cupcake. I made 30 of them. yeah, THIRTY. That's a mama's love, huh?

Help, my house is infested with catepillars... cupcakes, that is!

Sunday, April 10
My little patch out back
I love being outside (minus the bugs and the animals - lol ). So I decided to make it feel more like me. My son has the whole house, my husband has the garage. I don't have a room thats just for me. So, for the few months of decent weather, I want my own space.
Friday, April 1
Blog Train Freebies with The Design Girl
Happy April Fool's Day! The start of the month, the beginning of Spring, and what better way to start than with a new Sprint kit from The Design Girl and a whole blog train of freebies? Here is her Hop To It kit. How cute are those little bunnies and chickies??
Here is a layout I did with the kit from last year's Easter Egg hunt down in VA.This is our adorable God-daughter (and neice) on her first Easter Egg Hunt.
I have create 4.25 x 5.5 printable labels for those Easter gifts or just to use as a fun mailing label. Click on the preview below to download the files. Then be sure to scroll down so that you can find all the other free goodies by The Design Girl's CT team.


I have create 4.25 x 5.5 printable labels for those Easter gifts or just to use as a fun mailing label. Click on the preview below to download the files. Then be sure to scroll down so that you can find all the other free goodies by The Design Girl's CT team.

Your next stop is Andrea's blog
If you lose your way you can find the whole list of blog's here :
Sharon - http://quietangelsb.blogspot.com/
Ulrika - http://www.ulrikaulrika.se/
Enjoy the goodies!
Be sure to check out some of the other freebies on this site before you go - click on Freebies on the tab above. And I wanted to thank Danielle, her CT lead Andrea and all the other ladies for making me feel so welcome this month as a CT guest. It was a blast!
Subscribe to:
Posts (Atom)